How to get started with Kommo

May 15, 2023

If you’ve just created a Kommo account and need some help getting started, this article is for you. By following our instructions, you’ll be able to configure the main sections of your account and make the most out of Kommo.

In this article, you’ll learn about how to:

Customize your profile

To personalize your Kommo account, we recommend that you customize your profile first. You can start with the basics by adjusting your profile information and making it pretty so your Kommo account becomes truly yours.

This is where you manage your profile information, account preferences and configure your notifications. It is pretty easy to access it - just click on the photo in the upper-left corner and choose “Profile”.

You can upload your own profile picture to start customizing your CRM. You can also adjust your name, phone, email and choose your preferred language.

foto

👆 Tip: To learn more about how to setup your account, visit our How to customize your profile article.

Scroll down on the page and you will find your notifications settings.

To set up your notifications, simply tick or untick the boxes according to your preferences. You can choose to receive notifications for specific activities, and decide how and when you receive them.

You can receive notifications in the browser, by email, or by telegram. To receive notifications on your phone, you need to download our mobile app (Android/iOS) and log in with the same account details.

foto

👆 Tip: To learn more about how to configure your notifications, visit our How to configure your notifications article.

Invite your team

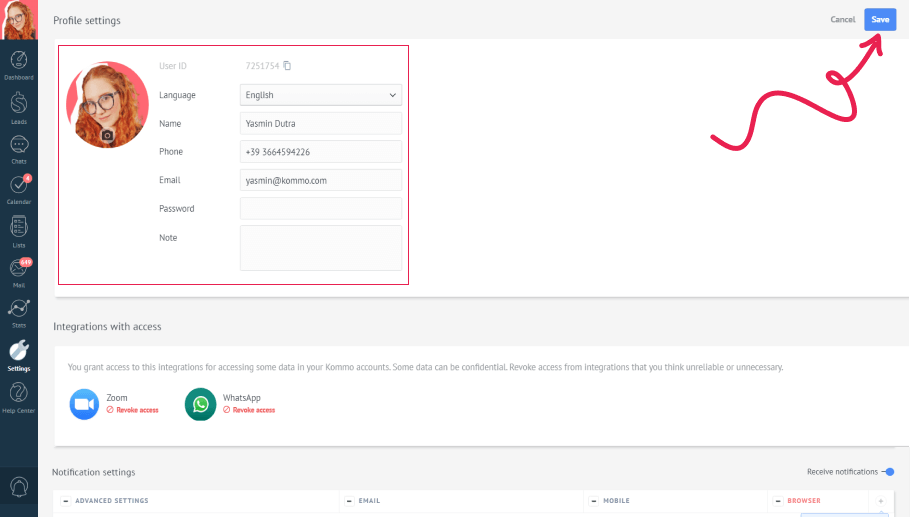
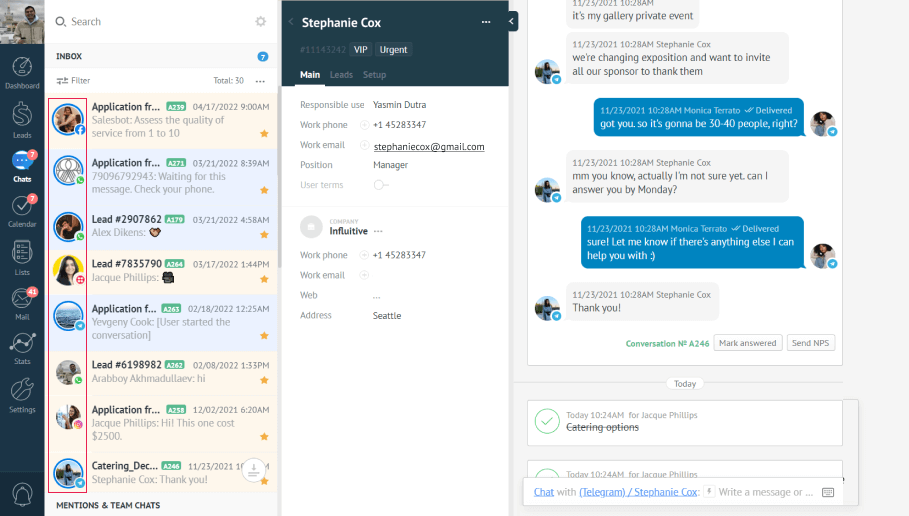
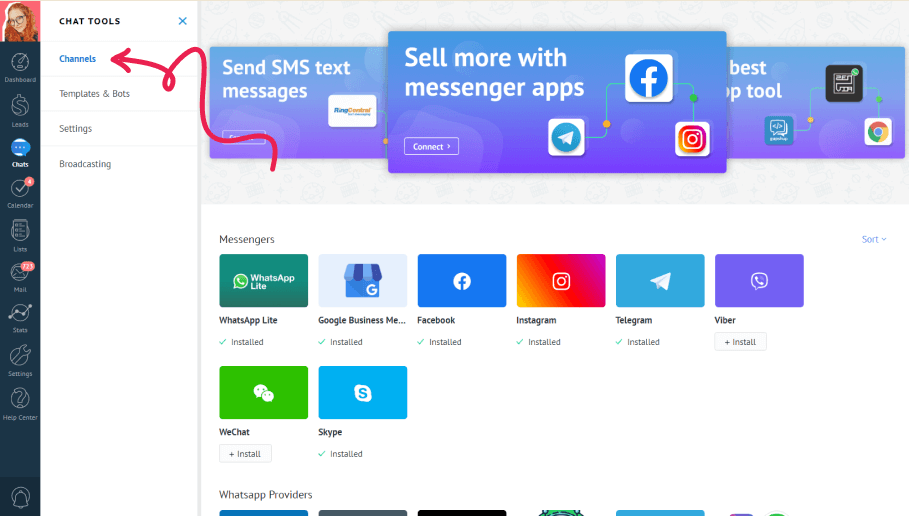
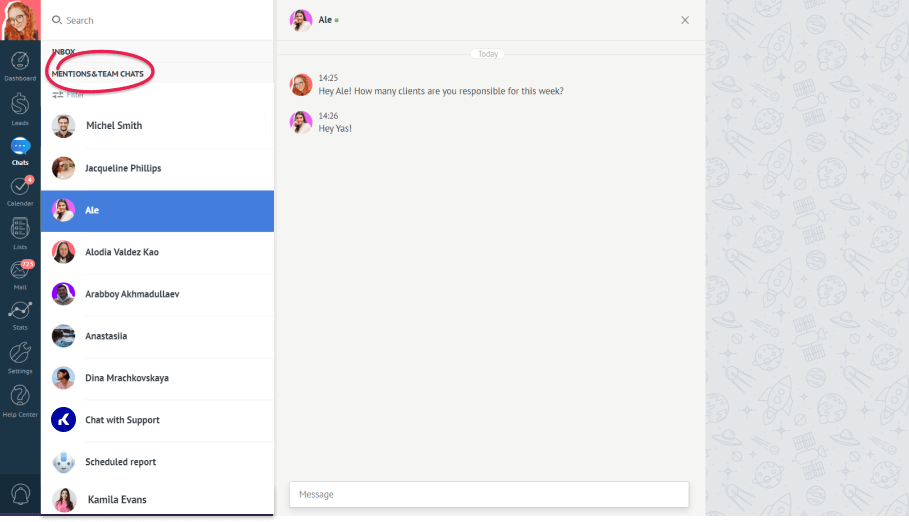
When you have finished customizing your profile, it is time to bring your team to Kommo to power-up your business process. You can collaborate with them in the chats section by assigning leads, clients and tasks to different team members.

You can also send internal messages to your team members or just create a team chat to discuss what kind of cake to buy for your colleague’s birthday for example :)

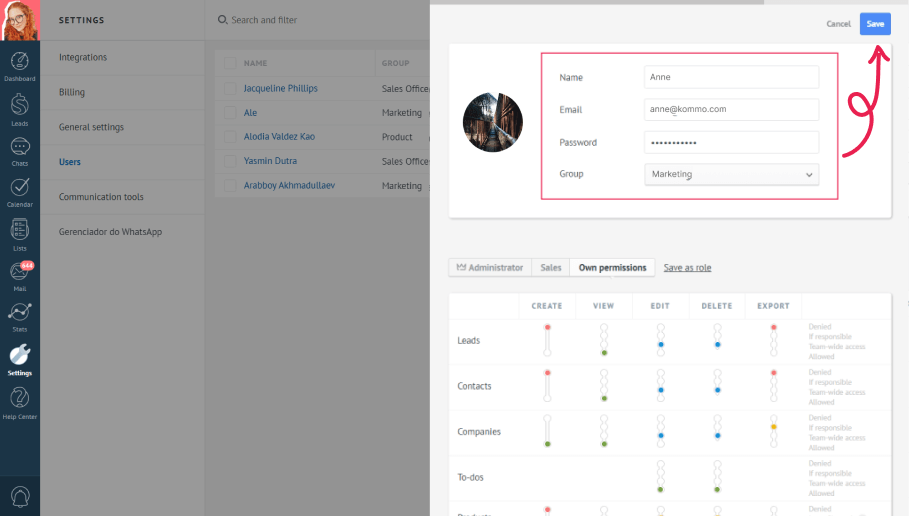
To add a new user, head over to Settings > Users and hit Add user on the upper right corner. Fill out the required fields, assign them to one of your groups and don’t forget to manage their permissions to different functions.

When you have done this, click Save and the invitation to join will be sent to the email of the user.

foto

👆 Tip: To learn more about users and how to manage them, visit the following articles: Adding users, Remove users, User rights, Free users.

Connect your messengers and apps

Once your team is settled in Kommo, you can start connecting the messengers your business uses to communicate with your clients. And the best part is - all incoming messages from all your channels will land in one unique inbox so you do not have to worry about juggling between different platforms.

foto

By going to Chats > gear icon > Channels, you can access chats integrations such as WhatsApp, Instagram, Facebook, Apple Messages for Business, Google Business Messages and many more.

foto

In the Chats section, you can also talk to your team members or contact support. To do this, just click on the ‘Mentions & Team Chat’ tab.

foto

👆 Tip: To learn more about how to navigate through your Chats, visit our Chats section article.

👆 Tip: To learn how to connect your messengers to Kommo, visit the Messengers and Integrations section of our knowledge base.

Connect your email and calendar

While messaging platforms are crucial to businesses nowadays, emails are still a very important communication tool. In Kommo you can connect multiple email inboxes to handle all your correspondences from a single place.

Head over to Mail > Settings > Add email to connect your mailbox. You can connect personal and shared mailboxes, as well as add templates and signatures to use in your emails.

foto

👆 Tip: To learn about how to connect your email with Kommo, visit the Mail article.

Manage your calendar

Set your first task by going to the Calendar > New task. Define the task type, add a responsible user and attach it to a lead or contact.

You can also sync with your Google Calendar by visiting three dots > Sync. Authorize your Gmail and your tasks will be available on your Google Calendar as well.

foto

👆 Tip: To learn more about the Calendar section and how to sync Google Calendar with Kommo, visit the Tasks and How to sync with Google Calendar article.

Configure your pipeline

In your pipeline is where most of the Kommo magic happens. Leads section is a place where you build your sales process visually and monitor the progress of your lead. This way no lead is left unattended.

Start by defining the stages of your sales process. By default, you are given a general pipeline with three stages: ‘Initial contact’, ‘Offer made’ and ‘Negotiation’. You can customize it by pressing the Three dots > Edit pipeline. Here you can add, delete or change stages names and colors. In addition, Kommo offers five different pipeline templates that can fit in your type of business - ‘Online store’, ‘Consulting’, ‘Services’, ‘Marketing’ and ‘Travel agency’. Just choose one of them and further edit if necessary.

foto

👆 Tip: To learn more about how to customize your pipeline, visit our Setting up a pipeline article

When setting up your pipeline, don’t forget to enable the incoming leads stage as well. By enabling this, all potential leads that your pipeline captures from your connected sources will land there. Think of it like a stage to sort out the incoming leads, you can delete the lead if it is spam, or accept it if it is your target audience. If it is the same lead writing from a different channel, just link it to an existing lead in your pipeline.

Once you’ve accepted a lead, Kommo will generate a lead profile where all their information and chats with you will be stored. You can drag-and-drop to move your leads through the pipeline stages or to the won/lost status.

foto

👆 Tip: To learn more about leads, visit out Incoming Leads and Lead profile articles.

Apply automations

Now that you have learned how to use your pipeline, you can apply automations that will help you save time to focus on what’s more important. In the Leads section click on ‘Automate’ in the upper right corner to add triggers in different stages of your pipeline.

You can do a lot here - set your pipeline to automatically run Salesbots, set tasks, send emails, change lead stages and much more. Simply click on “+” in a pipeline stage that you want your automation to happen and choose one of the actions to start automating. Why not start by adding a Welcoming bot to the first stage of your pipeline to welcome your clients when you are away?

foto

👆 Tip: To learn more about automations, visit our Digital Pipeline triggers article.

Salesbots can be your best virtual assistant, taking most repetitive tasks off your shoulders. And the most amazing part is that you don’t need any coding skills to build one. Create your first salesbot by going to Chats > gear icon > Templates & Bots > Create a Salesbot. Or, just choose one of our ready bot templates and adapt it under your needs.

foto

👆 Tip: To know more about the Salesbot and how to use it, visit the following articles: How to create a salesbot, Configuring the salesbot, Salesbot steps and actions full guide.

Track your progress

The Dashboard is where you can visualize the most important data of your business. Just click on an empty space to add a new widget like unanswered conversations, median reply time, longest waiting reply, tasks or turn any filter result into a widget on Dashboard.

Don’t forget to download our app on your watch to monitor the sales data on the go.

foto

👆 Tip: To learn more about the Dashboard, visit the following articles: Dashboard basics, Dashboard - creating custom widgets, Dashboard widgets - Advanced.

You can also make use of the Stats section to generate reports and utilize the performance of your business. It is a great tool to better understand your sales and improve the performance.

foto

👆 Tip: To learn more about the Stats section, visit our Analytics article.

Need more help setting up or troubleshooting? Contact us by sending an email to support@kommo.com or write to us on Facebook.

Not a user yet? Visit our tour page or contact us for a demo.

Try Kommo free

Discover how Kommo can transform your client management now