Dashboard - creating custom widgets

September 9, 2022

To make your dashboard experience more efficient, you can create your own customized widgets additional to the default widgets that we have provided.

To learn more about the default widgets visit our Dashboard and Dashboard widgets - Advanced articles.

In this article you will learn:

Creating widgets from filters

Prebuilt widgets are great and useful, but what if they don’t cover your needs? Don’t worry, we’ve got you covered. With our system you can create a widget from literally any data stored in your account.

Let’s see how you can do that.

First, there are 4 places you can create a custom widget from:

  • Leads section
  • Chats section
  • List section
  • Activity log in the Stats section.

Sounds complicated? It’s just a first impression, the way you create a widget is the same in every place. You just need to set up the filters you need, hover “Total” and click “Create widget”.

Let’s go ahead and create our first custom widget together.

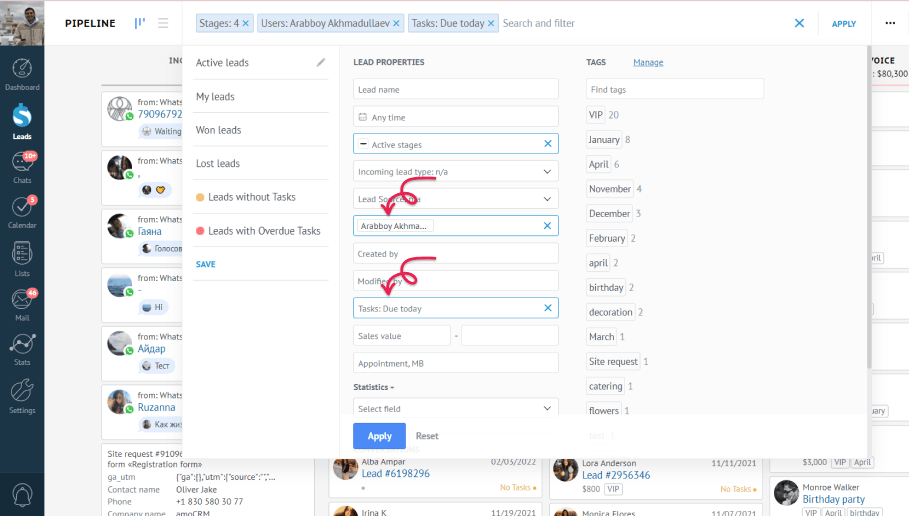
Our custom widget will be “My tasks due today”. To create this widget go to the Leads section, then click the search field. Here you can see all the filters available. For our widget we need to choose Task > Due today and then specify that these should be your tasks by Users > your name.

filter widget create

Now click Apply.

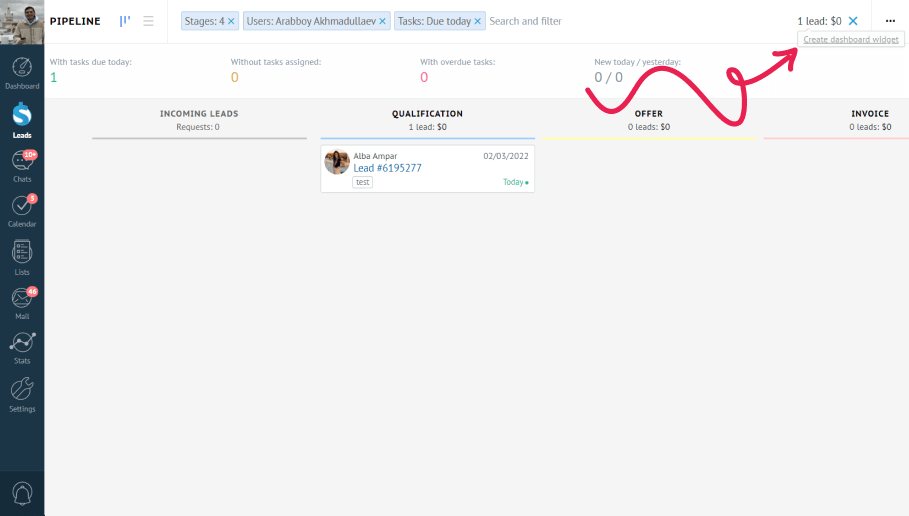
At the right corner of the field section will be the total number of your tasks due today - hover over that number and click “Create a widget”.

Create dashboard widget

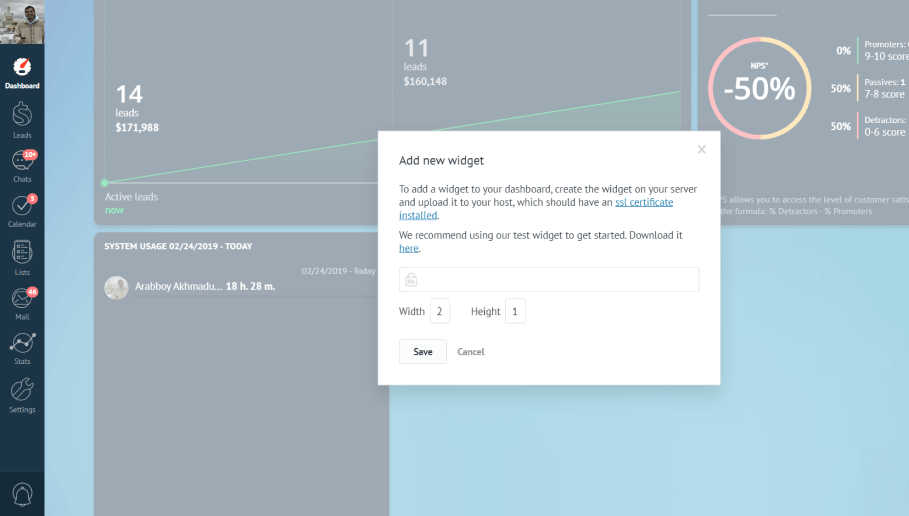
Choose the layout you want, name the widget, click save and here it is - a new widget is on the dashboard.

My tasks due

Adding your own widgets

Your dashboard is super flexible. You can also create your own widgets on your server and add them to your Dashboard. To do so, you have to create it on your server and then upload it to your host, which should have an ssl certificate installed.

To get started you can use the widget that we have made for you. Please, download it here.

When you have the widget, get the link from the host computer and enter it in the field. Just set the width and height and click the save button.

Add new widget

Now, you are ready to go!

Need more help in setting up or troubleshooting? Contact us by sending an email to support@kommo.com or write to us on Facebook.

Not a user yet? Visit our tour page or contact us for a demo.

Try Kommo free

Discover how Kommo can transform your client management now