Connecting your PayPal business account, one of the world's largest payment networks, to Kommo allows you to automate the process of sending invoices and let your clients make payments in a click. We will give you step-by-step instructions on how to easily connect your PayPal account with Kommo.
In this article, you will learn:
How to install the PayPal integration
Note: To install the PayPal integration, you need a PayPal business account. If you don’t have one, here you can find instructions on how to create a PayPal business account.
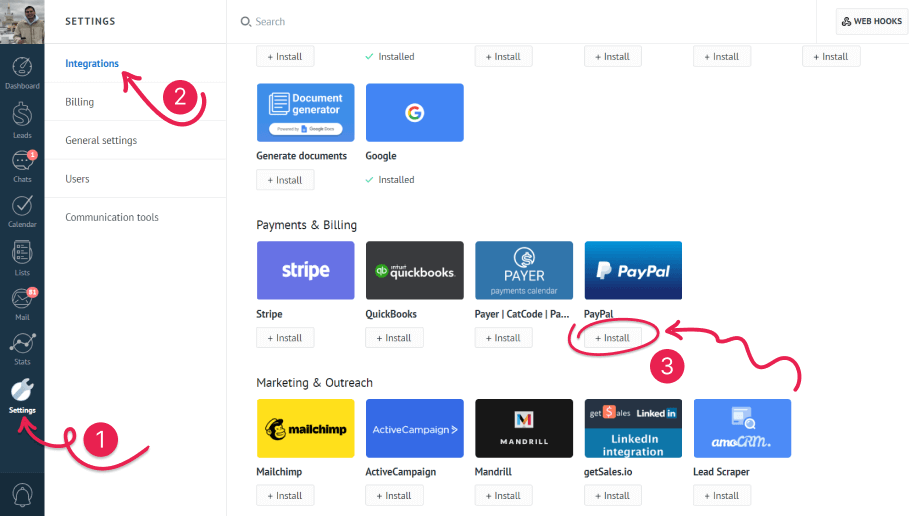
- To start installing PayPal, head over to Settings > Integrations and choose the PayPal widget in the Payments & Billing section.
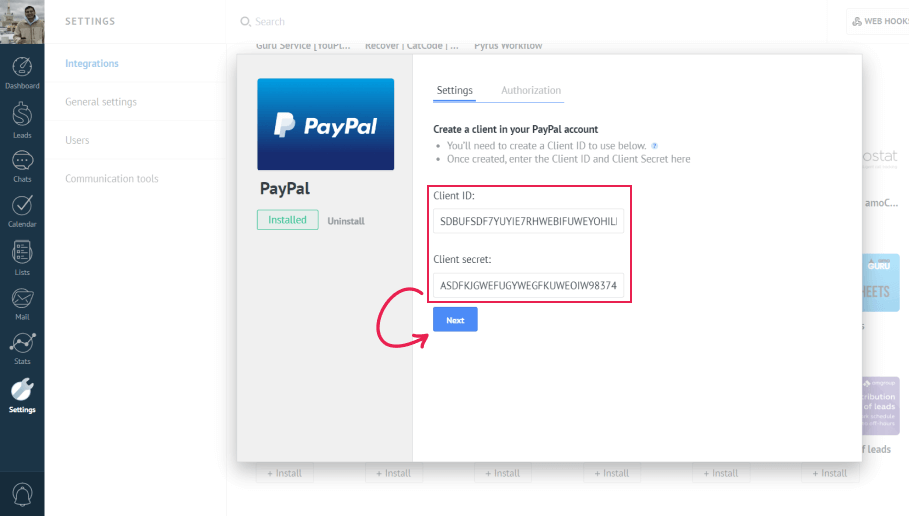
- Next, you need to accept the privacy policy of Kommo by checking the box and then hit ‘Install’.
- On the next window, just enter your PayPal Client ID and Client Secret into the corresponding fields and you are good to go!
How to create a Client ID and Secret
In order to get a Client ID and Secret, you need to create an app in your PayPal account. To create one:
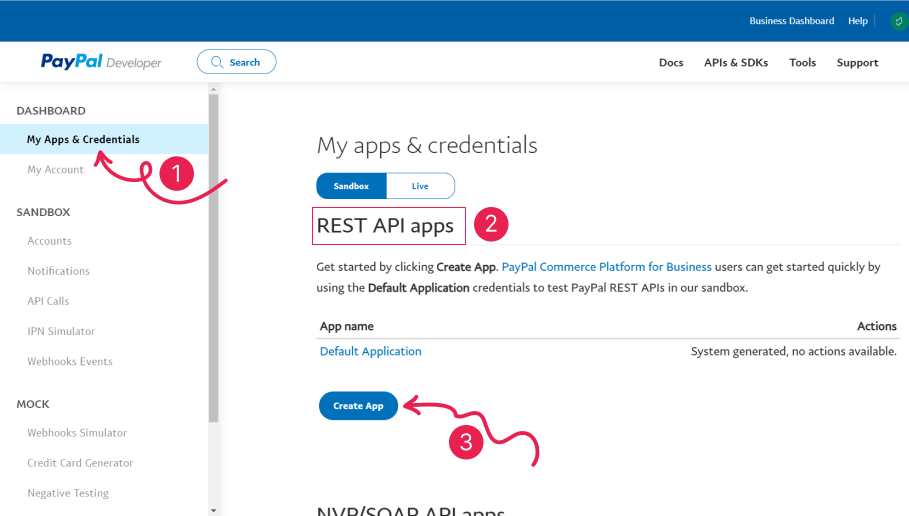
Log into the PayPal Developer Dashboard. If you aren’t logged in automatically, go to the ‘Log into Dashboard’ button in the upper right corner and sign in with your personal PayPal account details.
Next, on the left side menu, click My Apps & Credentials.
Under the REST API apps, click ‘Create App’.
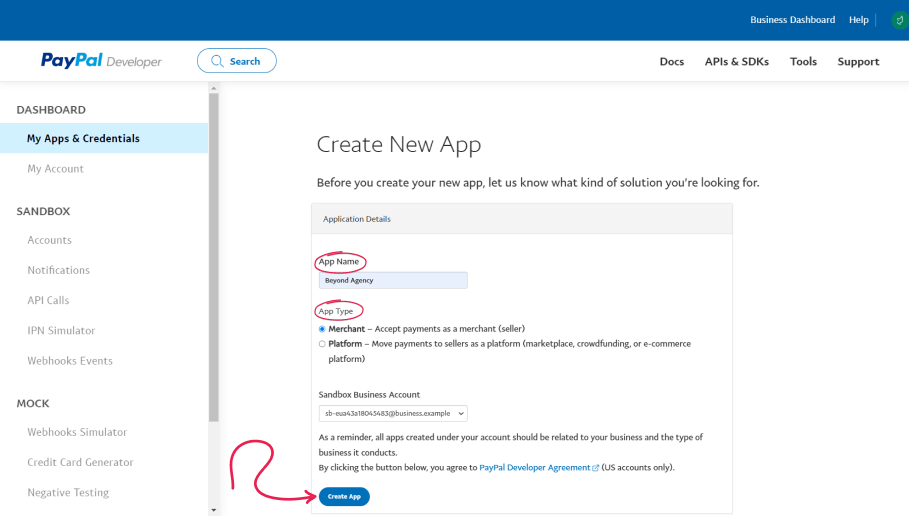
Enter a name for your application and choose an app type (you can select ‘Merchant’ if you are the receiver of the payments. ‘Platform’ is for different marketplaces where the money is moved to the owners of products)
Note: All apps created under your account should be related to your business and the type of business it conducts.
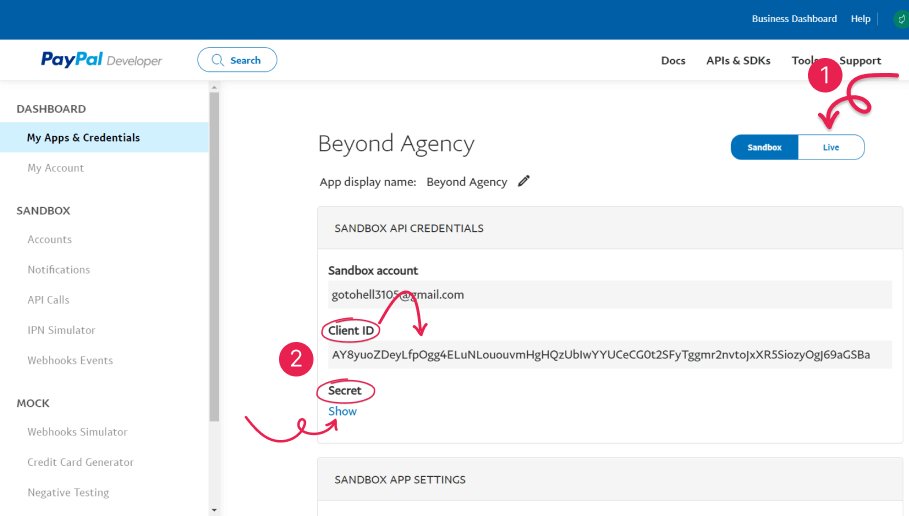
Once created, you will arrive in a test space (sandbox). Click the ‘Live’ button to move the app to the publication area. Otherwise you will not be able to connect it to Kommo. When ready, just copy the Client ID and Secret and paste them into the corresponding fields of the PayPal widget in Kommo.
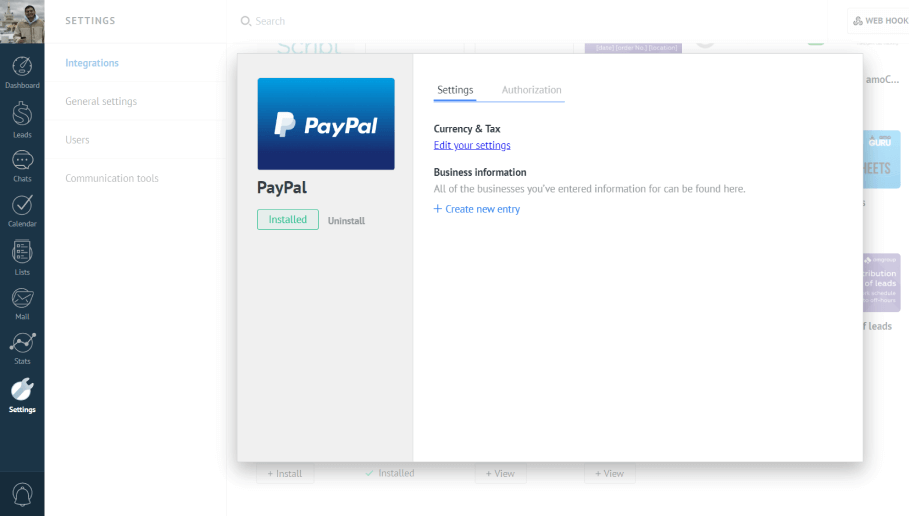
PayPal settings
When you finish connecting your PayPal and Kommo accounts, a new window with PayPal settings will pop up. Here you can configure your currency, tax and business information.
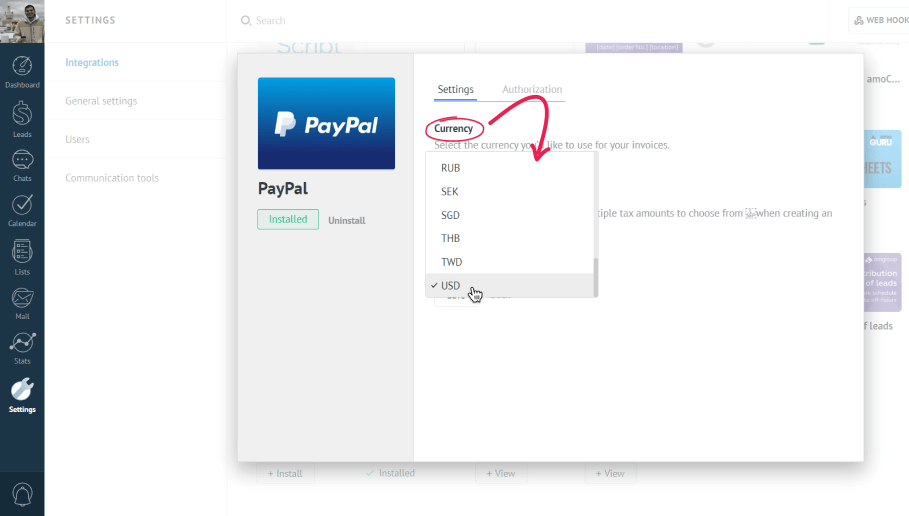
Currency
To change the Tax and Currency settings, click the ‘Edit your settings’ link. In this window, you can select the currency that you would like to use for your invoices.
PayPal supports 23 currencies. If your Kommo account’s currency is one of them, then the integration automatically adjusts to it. Or, you can always change it to a different currency from the dropdown list.
Taxes
In the same window, you can also configure your taxes. Since the taxation is completely different in each country, we cannot provide a single template. You can create your own tax template by just entering the name and interest rate of the tax. You can have several tax templates to choose from while creating an invoice.
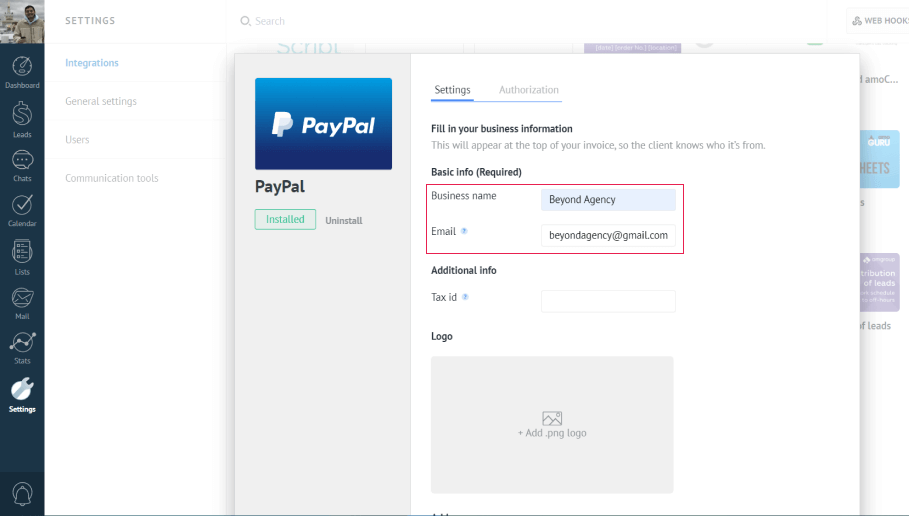
Business information
To create invoices, you have to have at least one business entry. To add your business entry information, click the ‘Create new entry’ button on the widget.
Only business name and email fields are required. Make sure to enter the correct email address that is used in your PayPal account.
Note: If you provide an email address that is not shown in your PayPal account, you will not be able to create invoices.
The rest of the fields are optional and are only needed to customize your invoices. They will be displayed on the top of your invoices. You can add your Tax ID, company logo, address and phone number.
If you want to learn how to create PayPal invoices in Kommo, visit our PayPal - How to create invoices article.
Need more help in setting up or troubleshooting? Contact us by sending an email to support@kommo.com or write to us on Facebook.
Not a user yet? Visit our tour page or contact us for a demo.