
Widgets in Digital Pipeline
Widgets in the digital pipeline
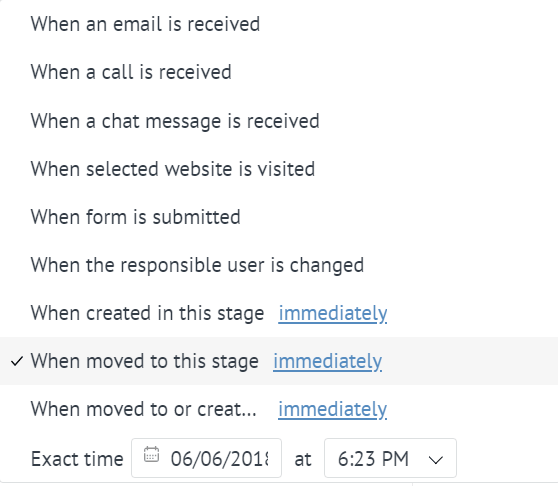
Widgets can interact with the functionality of the digital pipeline and respond to any of the following events:
- Incoming email
- Incoming call
- Incoming chat message
- Going to the stage
- Entering the site (for this event you can configure the pending action)
To enable the widget to interact with the Digital Pipeline, the manifest.json file must specify the digital_pipeline scope and the dp/settings block.
Upon the occurrence of an event, we will send a webhook to the specified address. It’s important to note that we expect a prompt response from your accepter.
By using the webhook_url property of manifest.json, you can retrieve data from the digital pipeline to your server without needing to send the widget for moderation.
{
    "event": {
        "type": 15,
        "type_code": "lead_appeared_in_status",
        "data": {
            "id": 123123, // Lead ID
            "element_type": 2, // Type of entity (2 - lead)
            "status_id": 654321, // Stage ID
            "pipeline_id": 123456, // Pipeline ID
            "direction_of_movement": "went_to_trigger"//the direction of the lead movement relative to the trigger
        },
        "time": 1491300016
    },
    "action": {
        "settings": {
            "widget": {
                "settings": {
                    //Digital pipeline widget settings
                }
            }
        }
    },
    "subdomain": "my_company",
    "account_id": XXXXXXX
}
List of possible values of type and type_code
type_code| Code | Type code | Description |
|---|---|---|
| 1 | lead_added | Add a lead |
| 14 | lead_status_changed | Change of the stage of the lead |
| 15 | lead_appeared_in_status | Change the stage inside the widget’s action extended into several stages* |
| 16 | mail_in | Incoming email |
| 17 | call_in | Incoming call |
| 18 | site_visit | Visiting the site |
| 19 | chat | Incoming chat message |
In the case where you set action_multiple to true in the dp block of your manifest.json, you allow your widget's action to extend over multiple stages. When the stage of a lead changes and it is one of multiple stages of your widget is extended over, you receive type with the code 15. At the same time, when the lead transitions to a stage that activates your widget, you receive type with the code 14.
direction_of_movement parameter
direction_of_movement parameter| Value | Description |
|---|---|
| went_to_trigger | The lead has moved from a stage in the pipeline without a trigger to a stage where the trigger is present. |
| went_in_trigger | The lead has moved from one stage of the pipeline to another within the area of the extended trigger (possible only when action_multiple = true in manifest.json). |
| went_from_trigger | The lead has moved from a stage in the pipeline where a trigger is present to a stage where there is no trigger (possible only when action_multiple = true in manifest.json). |
Automatic setting block
This section does not include the backend part of the widget and the code won't work without backend. Here, we only want to showcase the capabilities of the widget's functionality in Digital Pipeline.
Once your widget has been successfully added and is available for integration, access to its settings will be possible from several areas. First and foremost, full settings access will be available in the standard way, just like for all integrations, from the Settings ➡️ Integrations section of your account. If your widget is an integration with Digital Pipeline, access to it will also appear in the Digital Pipeline settings, under the Leads section, where you can manage automatic actions for all leads.
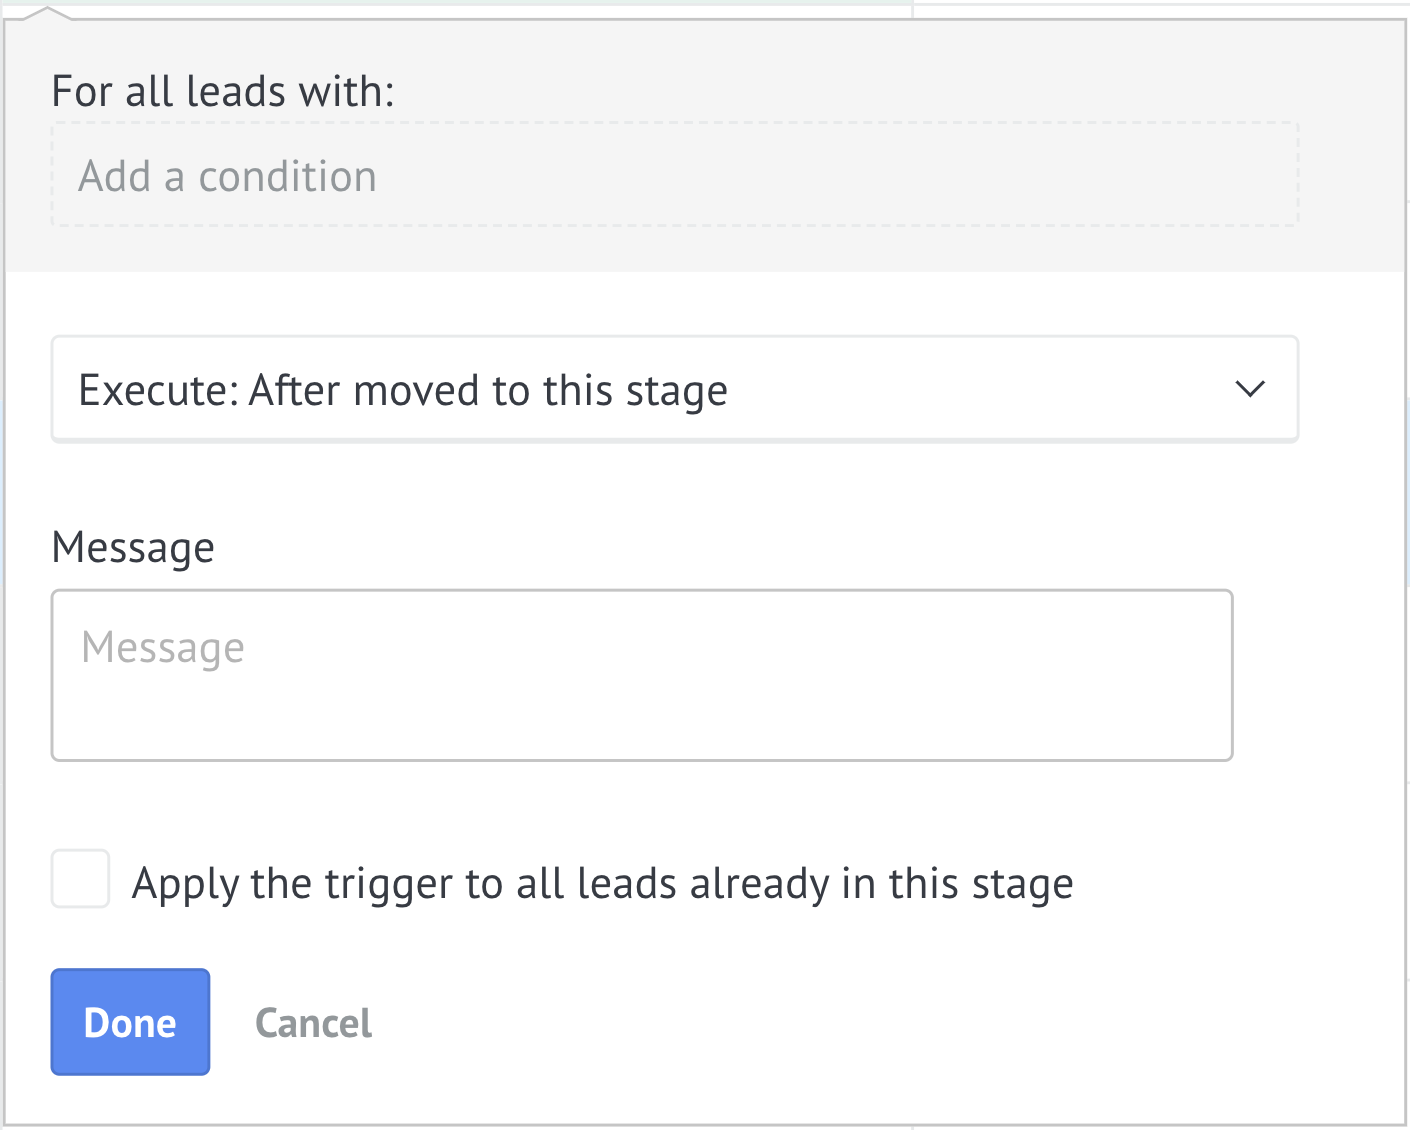
This element is rendered on our side, including the selection of the condition under which your widget’s action will be executed. On your side, you need to populate the element with quick settings or action selections that will be performed when the user-selected condition is met.
For example, let’s describe the front-end part of the widget in script.js, which displays the settings within the quick settings element. We’ll choose to send a message when a user-selected condition is met (see the screenshot above).
Example
dpSettings: function() {
    var w_code = self.get_settings().widget_code, //The widget code specified in manifest.json
        lang = self.i18n('settings'),
        dp_modal = $(".digital-pipeline__short-task_widget-style_" + w_code)// we can reference the element that specifically contains your widget.
        .parent()
        .parent()
        .find('[data-action=send_widget_hook]'),
        message_label = dp_modal.find('[title^=' + lang.message.split(" ")[0] + ']'), //Your explanations to the fields,described in com.json
        message_label_new = "" + lang.message + "",
        message_input = dp_modal.find('input[name=message]'), //The reference to the entered text
        message_textarea = self.render( //Render the text input field
            {
                ref: '/tmpl/controls/textarea.twig'
            }, {
                id: 'dp_message',
                style: {
                    'width': '396px',
                    'margin-top': '5px',
                    'margin-bottom': '-3px'
                },
                value: message_input.val(),
                placeholder: lang.message
            }
        );
    message_label.hide().after(message_label_new);

    message_input.hide().after(message_textarea);

    return true;
}
It’s important to remember about declaring the settings in manifest.json.
"locations": [
    "settings",
    "digital_pipeline"
  ],
"dp": {
    "settings": {
      "message": {
        "name": "settings.message",
        "type": "text",
        "required": true
      }
    }
Placeholders
Placeholders are used for automatically populating data from lead/contact/company profiles into text messages. With the presence of placeholders in the integration, you can create universal text messages for a whole list of contacts, saving time on data substitution in each individual case.
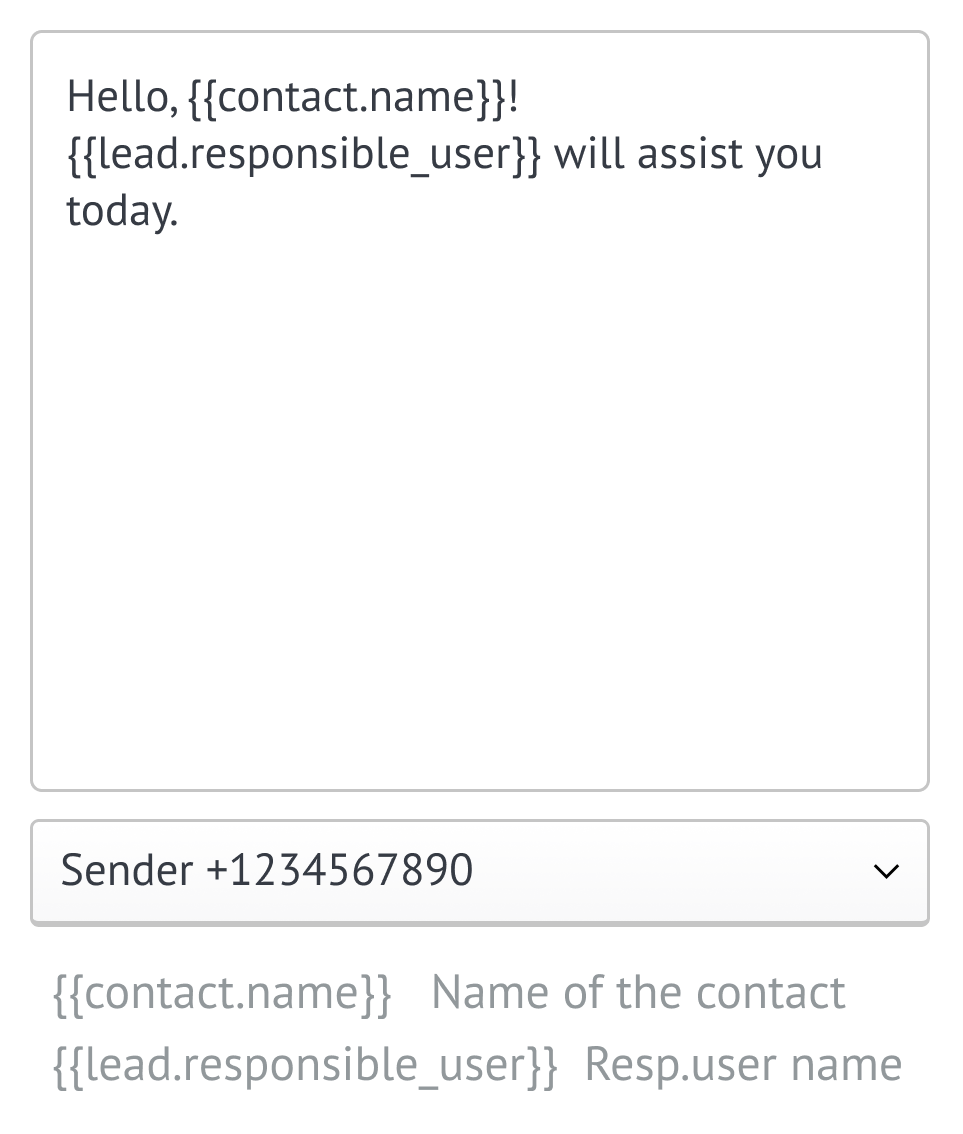
Main Contact
In the event that in your integration there is a function of sending out any information, then it may be useful for you to send information only to the main contact. A lead can have more than one contact, so the implementation of the function of sending information only to the main contact can be useful to users.

You need to add the ability to select a distribution only to the main contact in the quick setup area, when you connect the widget in automatic actions for all leads in the digital pipeline.
dpSettings: function() {
    var lang = self.i18n('dp.settings');
    var form = $('#widget_settings__fields_wrapper');
    var field_divs = form.find('.widget_settings_block__input_field');
    var textarea_div = field_divs.first();
    textarea_div.html('<textarea name="message" ' +
        'style="height:50px; width: 100%;" ' +
        'id="message" ' +
        'class="text-input text-input-textarea digital-pipeline__add-task-textarea textarea-autosize task-edit__textarea">' +
        '' + textarea_div.find('input').val() +
        '</textarea>');
    var checkbox_template = '<label class="control-checkbox">' +
        '<div class="control-checkbox__body">' +
        '<input type="checkbox" id=""/>' +
        '<span class="control-checkbox__helper"></span>' +
        '</div>' +
        '<div class="control-checkbox__text element__text">' +
        '<span class="control-checkbox__note-text">' + lang.only_main.name + '</span>' +
        '</div>' +
        '</div>' +
        '</label>';
    var checkbox_div = field_divs.last();
    checkbox_div.siblings().html('');
    checkbox_div.html(checkbox_template);
    return true;
}
Logging
In the event that, based on the results of your widget, you need to enter the appropriate notification information in the entity profile, then we recommend using the addition of a system event( note).
Events are displayed in the profiles along with the tasks, always in chronological order.
To add a system event (note), you must specify "note_type": "extended_service_message".

Salesbot connection
In Kommo, there is an option to connect an already implemented salesbot. This bot can be programmed to perform specific actions and helps gather data from users via messengers (Telegram, Facebook Messenger, Viber).
A detailed guide on connecting, functionality, settings, language, and working with our Salesbot can be found in theSalesbot section.
Exchange information with external web servers
Every account in Kommo with an advanced plan or higher has the ability to notify your web server about actions. These WebHooks can be used to update lead information in your store, send SMS notifications, or automate lead management. Each WebHook can be configured for specific operations and events.
WebHooks are notifications sent to third-party applications about events that occur in Kommo. For more information on how WebHooks work and on the digital pipeline, please refer to the WebHook section.
Updated 21 days ago